5 steps you can take to stop rats from getting in your house
Written by Josh Stevenson, owner of Smart Pest Pros, 11 years experience.
Step 1 - Remove food
I can’t emphasize this enough! It’s amazing how many jobs we do and how many clients we tell to remove food from the garage, from kitchen counters, etc and we get multiple call backs just to find some hidden bag of flour or rice or dog food (I call it crack for rats). It’s so easy to overlook stored bags of grains and not think they are getting to it because you’re not seeing activity near it but they are sneaky! One house we recently serviced included sealing holes, removing storage in the garage and fully cleaning the garage, cleaning the subarea and even cleaning inside because the tenants had been away for many weeks and the rats made it their own slice of paradise. There was lots of food out but the owner thought he removed all the food the rats were getting to and was confused why the rats were still getting in. He didn’t want to remove all the food and felt strongly the existing food wasn’t being touched and despite our advice wouldn’t put the food in areas the rats couldn’t get to. My techs went out and didn’t see any evidence of the food being tampered but we couldn’t catch the last rat and it didn’t appear it was creating any new holes to get in and out of the house. It took me going out and manually going through every bag of rice, every chip bag, every bottle of soy sauce and whatever else (I think the tenants were chefs, they seemed to have bottles and bags of everything). Once I got almost to the end of going through the food with no success of finding activity, I picked up a bag of flour and jackpot! I didn’t even notice the activity until I picked it up and saw the big hole in the back. The rat was so clever, it figured out how to eat the flour practically undetected by us! I threw that bag out and we finally had success.

Step 2 - Look for and seal entry points
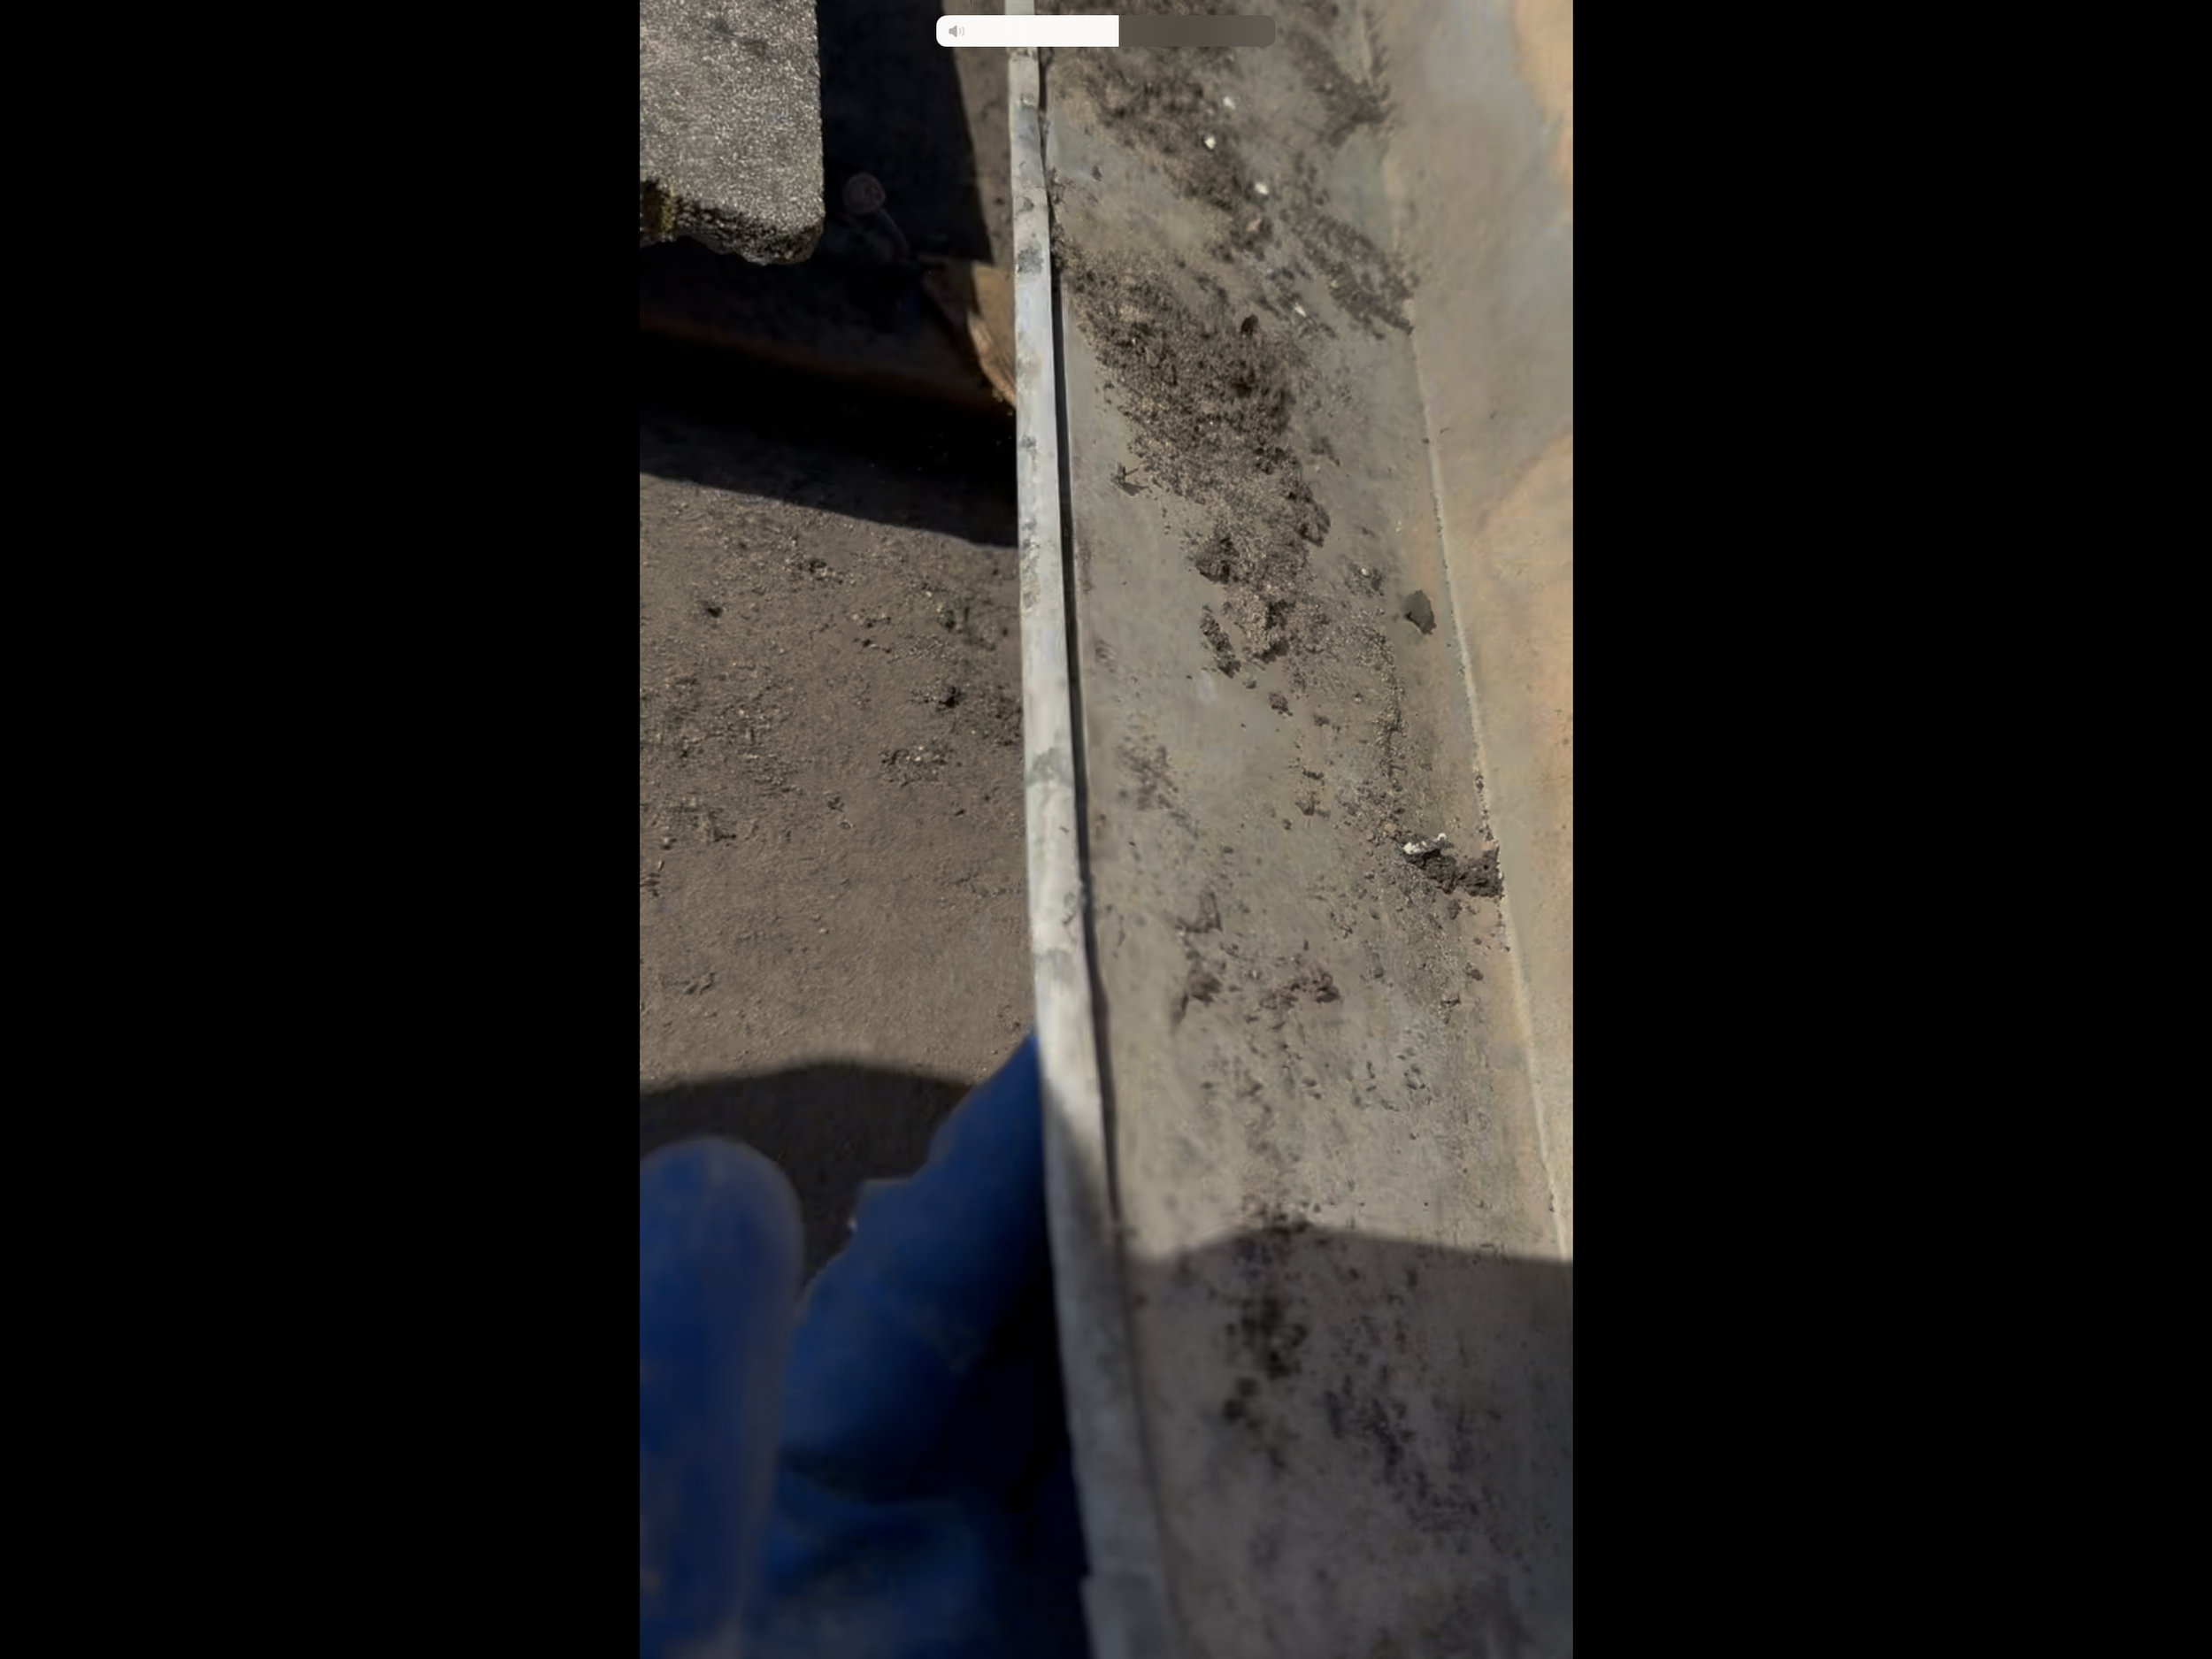
Ok, this is where the magic comes in. I really think most houses are pretty straightforward when it comes to this process. If you’re ok with the seals not looking great you can use steel wool and foam or even better screening and foam. Just make sure to use a sandwich approach (steel wool, foam, steel wool, foam etc.). If you want it to look professional and are in the Bay Area or Napa area, give us a call. The reason I think this is where the magic comes in is because this process alone is probably the most powerful thing that can be done to stop them long term. The food issue from number 1 is huge but if they’re not currently getting into food and just nesting or hiding in your attic, garage, subarea, etc. then removing food inside is pointless. Maybe this should be item 1, maybe I’m too lazy to change everything now. Nevertheless this is massively important. How do you do such an important task? First inspect and inspect really good. Look at all your foundation vents, all your soffit vents, all the areas where stucco or siding meets foundation, look for burrowing in soil, get in your attic and try to figure out where the activity is and look for trails. Sometimes you can find the gaps in your attic easily, sometimes you’ll need a pro (as mentioned call us, we have awesome ratings for a reason). I recommend and always do take pictures of every hole. This way you can remember what needs to be sealed. If you want to get really fancy make a diagram of your house and notate the holes. Go about sealing any way you can. As mentioned earlier foam with a metal backing works in a pinch and if done right can be very effective - just not super good looking. If you have sealed everything you can find and still have issues in the attic and you feel there are entry points there I would seriously consider calling a pro - especially if you have a tile roof. They often get under the tile and get into openings into the roof sheathing requiring us to remove tiles to seal the hole! Not a job for a DIY guy. Below is a series of screen grabs from a video I took during an inspection where I removed a few tiles to access a spot I suspected had rodent entry (and sure enough it did). The last picture is an example of the diagram we give to customers.


Step 3 - Set Traps
For most people this is the first step. Maybe putting out poison is step 1 for others. Nevertheless, it should ideally be done with sealing up holes. If you do want to set traps first, please use this trick - don’t set the traps but do place them in the area(s) with rodent activity. Put a selection of bait on and around the traps and take a picture. Check the traps the next day and refill what food was eaten. Repeat this process a few days and then set the traps with the preferred food. You’ll have some dead rodents that night. It’s not 100% foolproof but much more effective than setting the traps day 1. Rodents are smart and rats are especially good at not getting caught in traps. Often times you’ll get one the first night and tell your wife so you’ll get the hero treatment, no noises for a night or two (yay!) but then they come back and now the wife is more mad than before, now you’re wishing you would have taken her advice and called a pro from the beginning (hint, hint). Don’t stress you can still try the approach above but bear in mind you really need to find the entry points and if you skipped step 2 you’ll be in the dog house until you call us. Another tip is to try multiple types of traps if you can’t seem to catch them. Also go back and reinspect the house to make sure there aren’t any spots you missed or any new holes created. Often times recurring activity can be solved by us going back out and thoroughly reinspecting. Last thing about traps, if it’s rats usually a few traps in each area will suffice. If it’s mice many traps in each area is necessary (also make sure to check the mouse traps more often - daily if you can). Last last tip, set traps so the bait is against a wall. Rats like feeling something against their whiskers.
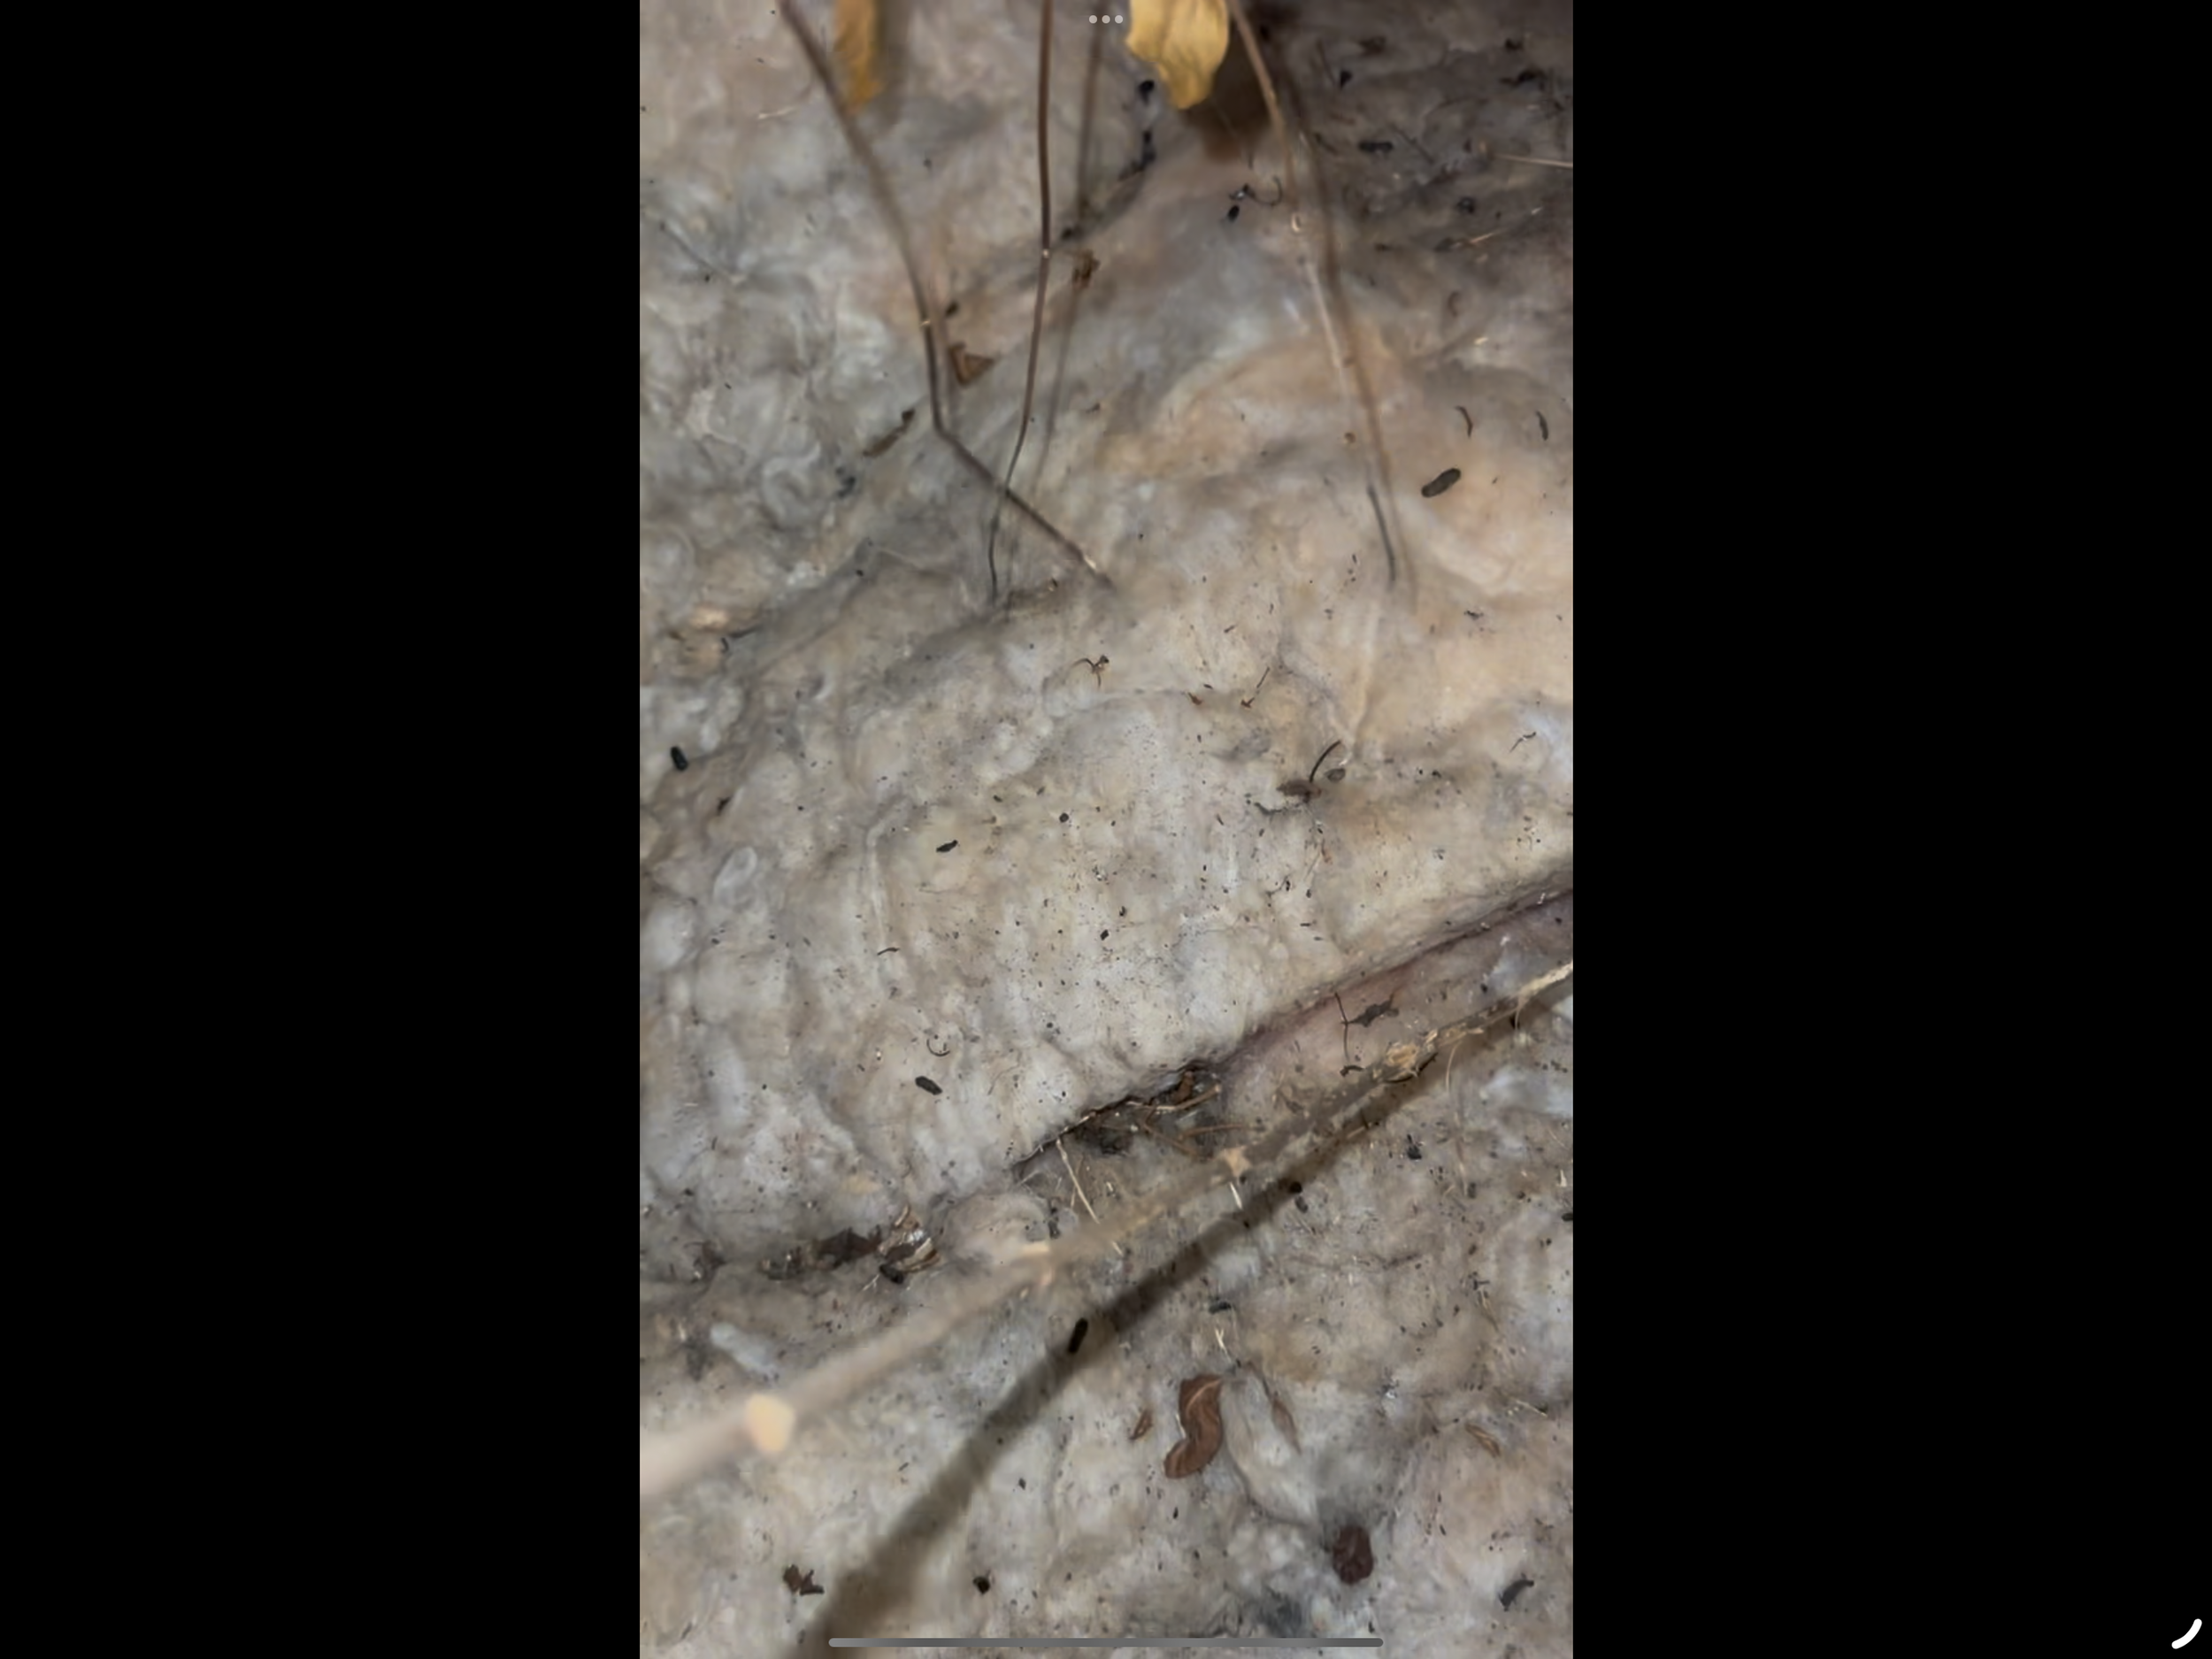
Step 4 - Clean Droppings
Definitely not the most fun step but still a great thing to do. Not only do you disturb their pheromones which can mess up their habits and trails, you’ll also feel like your house is much more livable than before. Be sure to use a mask and gloves especially with mouse droppings). Spray the droppings with a disinfectant first before cleaning. If you plan to use a vacuum be sure it has a hepa filter. Most likely every dumb, generic post you’ll read online will recommend removing and replacing the insulation. The truth is it’s a good idea if the droppings are real heavy but there’s no scientific data proving it benefits health or anything like that. If you are disgusted by the amount of droppings, get it replaced! If you’re okay with it, don’t worry about it. The main benefit to cleaning from an honest pest pro’s perspective is that it helps us understand if there’s new activity. It does help prevent them from coming back (at least in theory) but the truth is you can spend thousands on removing and replacing insulation and cleaning every square inch and still have rats that same night after the crew leaves if the holes aren’t sealed correctly or if they can get in and out from new holes they create.
Step 5 Rinse and Repeat
Getting the picture that rodents can be really tough to get rid of? If so, you can see why most companies have a massive love, hate relationship with rodent work. Once you’re done with the steps above and it’s been a few weeks and the wife is starting to finally see you as the hero you know you are… you hear those G$& D&^& beeeeeeeeeeep NOISES again. Now you’re reaaallllly regretting not making the call. You saw us on Yelp, she sent the link, you liked what you saw, but YouTube told you how easy it would be. You knew you could knock these things out yourself. Ok, don’t throw in the towel yet (again if you do no shame in it, we’re only a call away!). It’s time to repeat steps 1-4. Be VERY careful about step 2. Take your time looking for the holes. They’ve alluded you to this point. If you know for a FACT they aren’t getting to food in the house, it’s all about finding the entry point. Might be time to run to Home Depot to get a tyvek suit and slither around the attic and get dirty in the crawl space. It’s likely not going to be an easy to find hole at this point but you can taste victory. Be diligent my DIY friend. Find the holes and find success.
Ready to be the hero? Call us today for an inspection. We provide awesome, thorough inspections that include a written report, pictures and a bid. We only charge $85 for most rodent inspections and we waive that fee if you do any work with us*.
* Real estate transactions and larger properties may incur a larger fee and may not be subject to the fee waiver.